Table of Contents
Setting-up the Wiimote for an interactive whiteboard
The Wiimote Whiteboard concept originates from the research done by Johnny Chung Lee at the Human Computer Interaction department of Carnegie Mellon University.
General Setup
OSCulator Support
OSCulator receives the IR signal of one or several Wiimotes, and processes this signal into a TUIO stream (TUIO is a protocol describing the position of objects in space, typically for multi-touch applications). You can use the TUIO signal directly with OSCulator, or send it to another compatible program.
It is possible to use several Wiimotes at the same time to help coping with “shadowed” areas (see Limitations).
Most of the setup in OSCulator consists of the calibration phase, which is needed in order to put the tracked coordinates into a normal frame of reference (perspective compensation).
Limitations
- Available in OSCulator 3+
- With a single Wiimote, up to 4 bright dots are tracked
- With several Wiimotes, only 1 bright dot can be tracked
OSCulator Setup
The physical setup of the Wiimote and projector are skipped (see picture above). We only describe the software setup in OSCulator.
The overall process works like this:
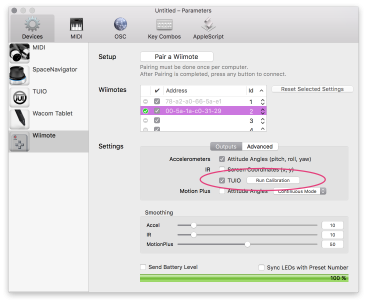
- Open the Parameters Window, and choose the Wiimote device panel
- Enable TUIO on desired Wiimotes
- Select the Wiimote(s) to calibrate for TUIO processing
- Press “Run Calibration”
Calibration
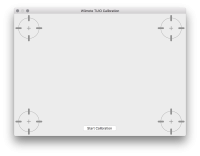
When you press “Run Calibration”, the calibration window appears.
- Place the calibration window according to your physical setup, that is, align the four bullseyes with the extreme corners of your interactive surface. The window can be placed anywhere at any size on the screen.
- Once the window is at the desired position and size, press “Start Calibration”.
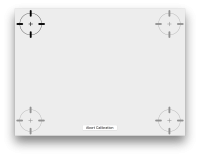
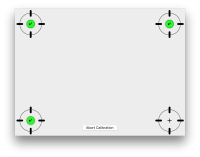
At this stage, the window can no longer be moved or resized. - Place your IR pen just next to the projected image of the top-left bullseye, and lighten it up so an IR bright dot can be detected.
- Repeat until 4 targets are acquired, or abort calibration at any moment by clicking “Abort Calibration”
Troubleshooting
- When using several Wiimotes, be sure to calibrate them all at the same time. Running the calibration several times for each individual Wiimote will not work because calibration data will be inconsistent.
- During calibration, sunlight may interfere with bright dot acquisition. Try to run the setup in a dark environment, or free from IR interference (incandescent lights, candles, etc.).
- It may be beneficial to tweak the Wiimote IR sensitivity, depending on how strong or far is your IR light source.


